Digital Manufacturing Week Three: QUALITY AND PROCESS Testing
Author: Callum Baxter Date: 15/02/2023 Topic: Digital Design and Manufacture
INTRODUCTION
During the third teaching week each of the prototype phones cases were checked for quality and compared against the original injection moulded counterpart. The prototype models were then tested on the Festo Cyber-Physical production line in a mock simulation of the final assessment. The performance of each prototype model was then critically evaluated and options to improve upon the quality of my models were discussed.
Quality Assurance
When a client outsources their production to a third-party mass manufacturing company they often require assurance that the parts produced are consistently high quality. This includes minimal variation between parts, consistent surface finish, consistent colours and consistent materials. Each of these criteria must also be met within the deadlines specified by the client. Mass-manufacturing companies typically use a variety of different strategies to control the quality of their products. A range of these strategies were reviewed with the aim to improve upon the performance and quality of the prototype phone cases. The brief for this assignment stipulates that 50,000 top phone cases must be produced annually to meet the clients’ specifications. Due to this large annual production volume, quality assurance strategies must be reviewed and implemented in order to avoid product returns and recalls.
Quality assurance strategies employed by mass-manufacturing companies can include:
Assessing incoming stock. This includes assessing materials, design specifications, tools and machinery.
Actively assessing production processes in real time. These assessments are integrated into the manufacturing process and can include: visual and functional testing of parts, and maintenance of tools and machinery. These assessments are usually binary tests (pass/fail) and aim to eliminate inferior products from the manufacturing procedure and identify faulty tools/ machinery.
Output control procedures. This final quality control phase aims to further reduce the presence of product variation and validate the previous quality control procedures. These procedures measure the quality of products once production has completed. Issues identified within this process should be rare, otherwise the previous quality measures can be considered ineffective and need revision.
Assessing Incoming Stock
A reliable and consistent source of raw materials will help to produce high quality products. The quality of additive manufacturing materials is variable between suppliers, but material sourced from the same supplier can be considered consistent. Below (Fig.1-8) is a list of material suppliers, their associated technologies, and the price of the materials. The costs associated with mass-manufacture will be discussed in a dedicated blog post, but the selection of materials below gives a good representation of the material costs associated with different additive manufacturing processes as of January 2023.
Test Fitting
The images below show the test fitting that was done to help assess the quality of the prototype phone cases.
The carriages shown in the Figures 9-10 are used to orientate and position the phone case as it travels around the production line. Each carriage contains a Radio Frequency Identification (RFID) chip that interacts with each of the stations within the production line and allows orders to be assigned to the carriage from the control station. Figures 9-10 show that my initial prototypes (both FDM and SLA) fit within the carriages properly and do not interfere with the function of the carriage or its interaction with the conveyor belt and do not block sight to the QR code and identification number.
Figures 11-12 shows the comparison between the surface finish for the SLA, FDM and original injection moulded parts. FDM was found to have the worst surface finish and the post-processed SLA parts had a surface finish comparable to the injection moulded part.
Figures 13-14 show the test fitting of the prototypes with the injection moulded phone case bottom. It was identified that the post processing techniques used to give the SLA prototype a superior surface finish also reduced the dimensional accuracy of the part to an unacceptable level. Figure 15 draws attention to this issue. The identification of this error was important as it highlighted that hand sanding was not an appropriate post-processing technique and would result in dimensional variation between parts.
Lastly, Fig.14 shows how the electronic components are placed within each prototype. No problems were identified during this stage of testing and the electronic components fit within each prototype without issue.
Conclusion of Test Fitting
During this phase of testing it was determined that the engineering drawing was correctly interpreted and the parametric model of the phone case was accurate. This was because the prototype case fit within the carriage and married with the bottom casing perfectly. However, inappropriate production and post-processing methods were identified. It was discovered that, despite the SLA prototypes possessing superior surface quality when compared to the FDM prototypes, the post processing of the SLA prototypes resulted in dimensional inaccuracies when married with the bottom part of the phone case (Fig.15). Additionally, the FDM prototypes produced on the Ultimaker were identified to be dimensionally inconsistent and had an unacceptable surface finish (especially where supports were used). Despite the SLA prototype being generally superior in quality compared to the FDM prototype, it was concluded that the post processing of the SLA prototype needed to be refined in order to increase product quality and reduce production time and costs. It was important to remove human error from this process as much as possible, so hand sanding was established as an inappropriate post-processing method. Below (Table 1) is a list of post processing strategies that could be undertaken using the resources available within PrintCity.
Table 1: Post-processing methods for both SLA and FDM technologies.
This comprehensive list of post processing methods with their associated advantages and disadvantages will help to inform my mass-manufacturing strategy as I move forward with this project. I will test a variety of these methods and record the time, cost, associated risks and quality of outcome in order to determine a suitable workflow in a future blog post.
PROCESS TESTING
Active Quality Testing
The SLA prototype phone case was tested on the Festo Cyber-Physical production line as a form of active quality testing. Within the context of the brief, this type of active testing would be required before committing to the mass-manufacture of a product in order to pre-emptively identify production inefficiencies and risks.
The production was completed in 2 minutes and 2 seconds. It was important to record the duration of production so that it could be used as an average when making calculations regarding the mass-production of phones.
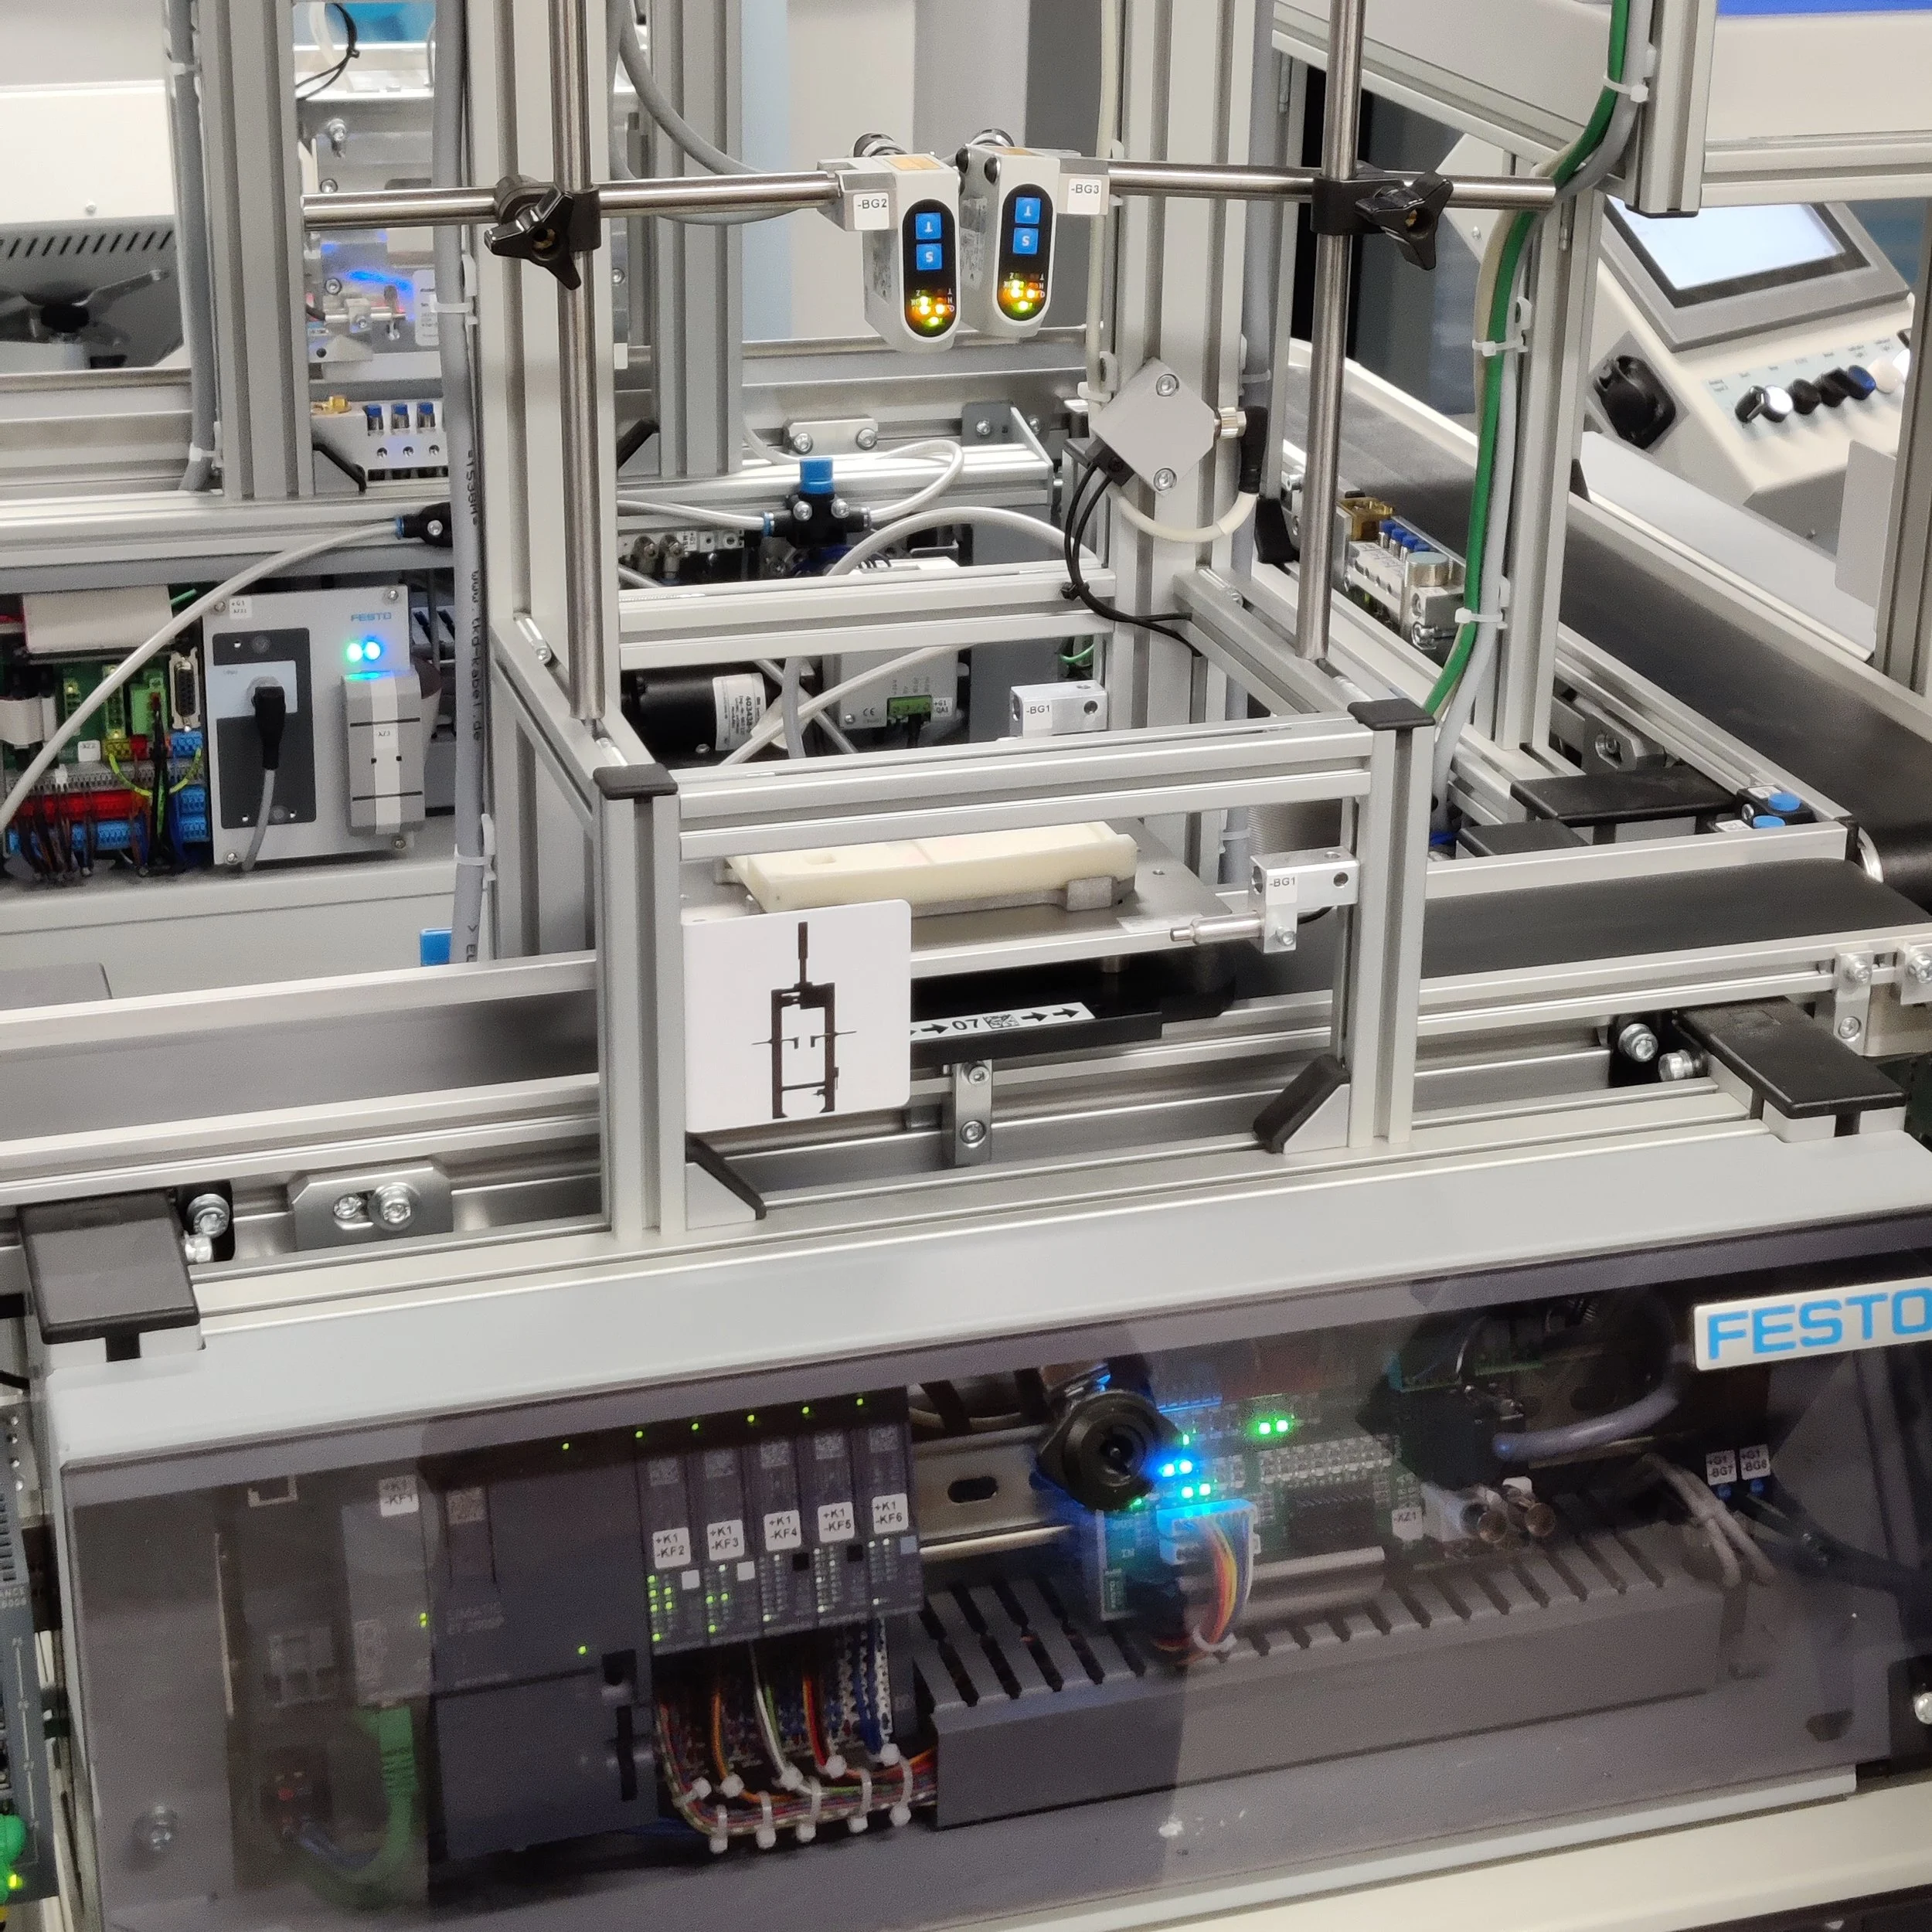
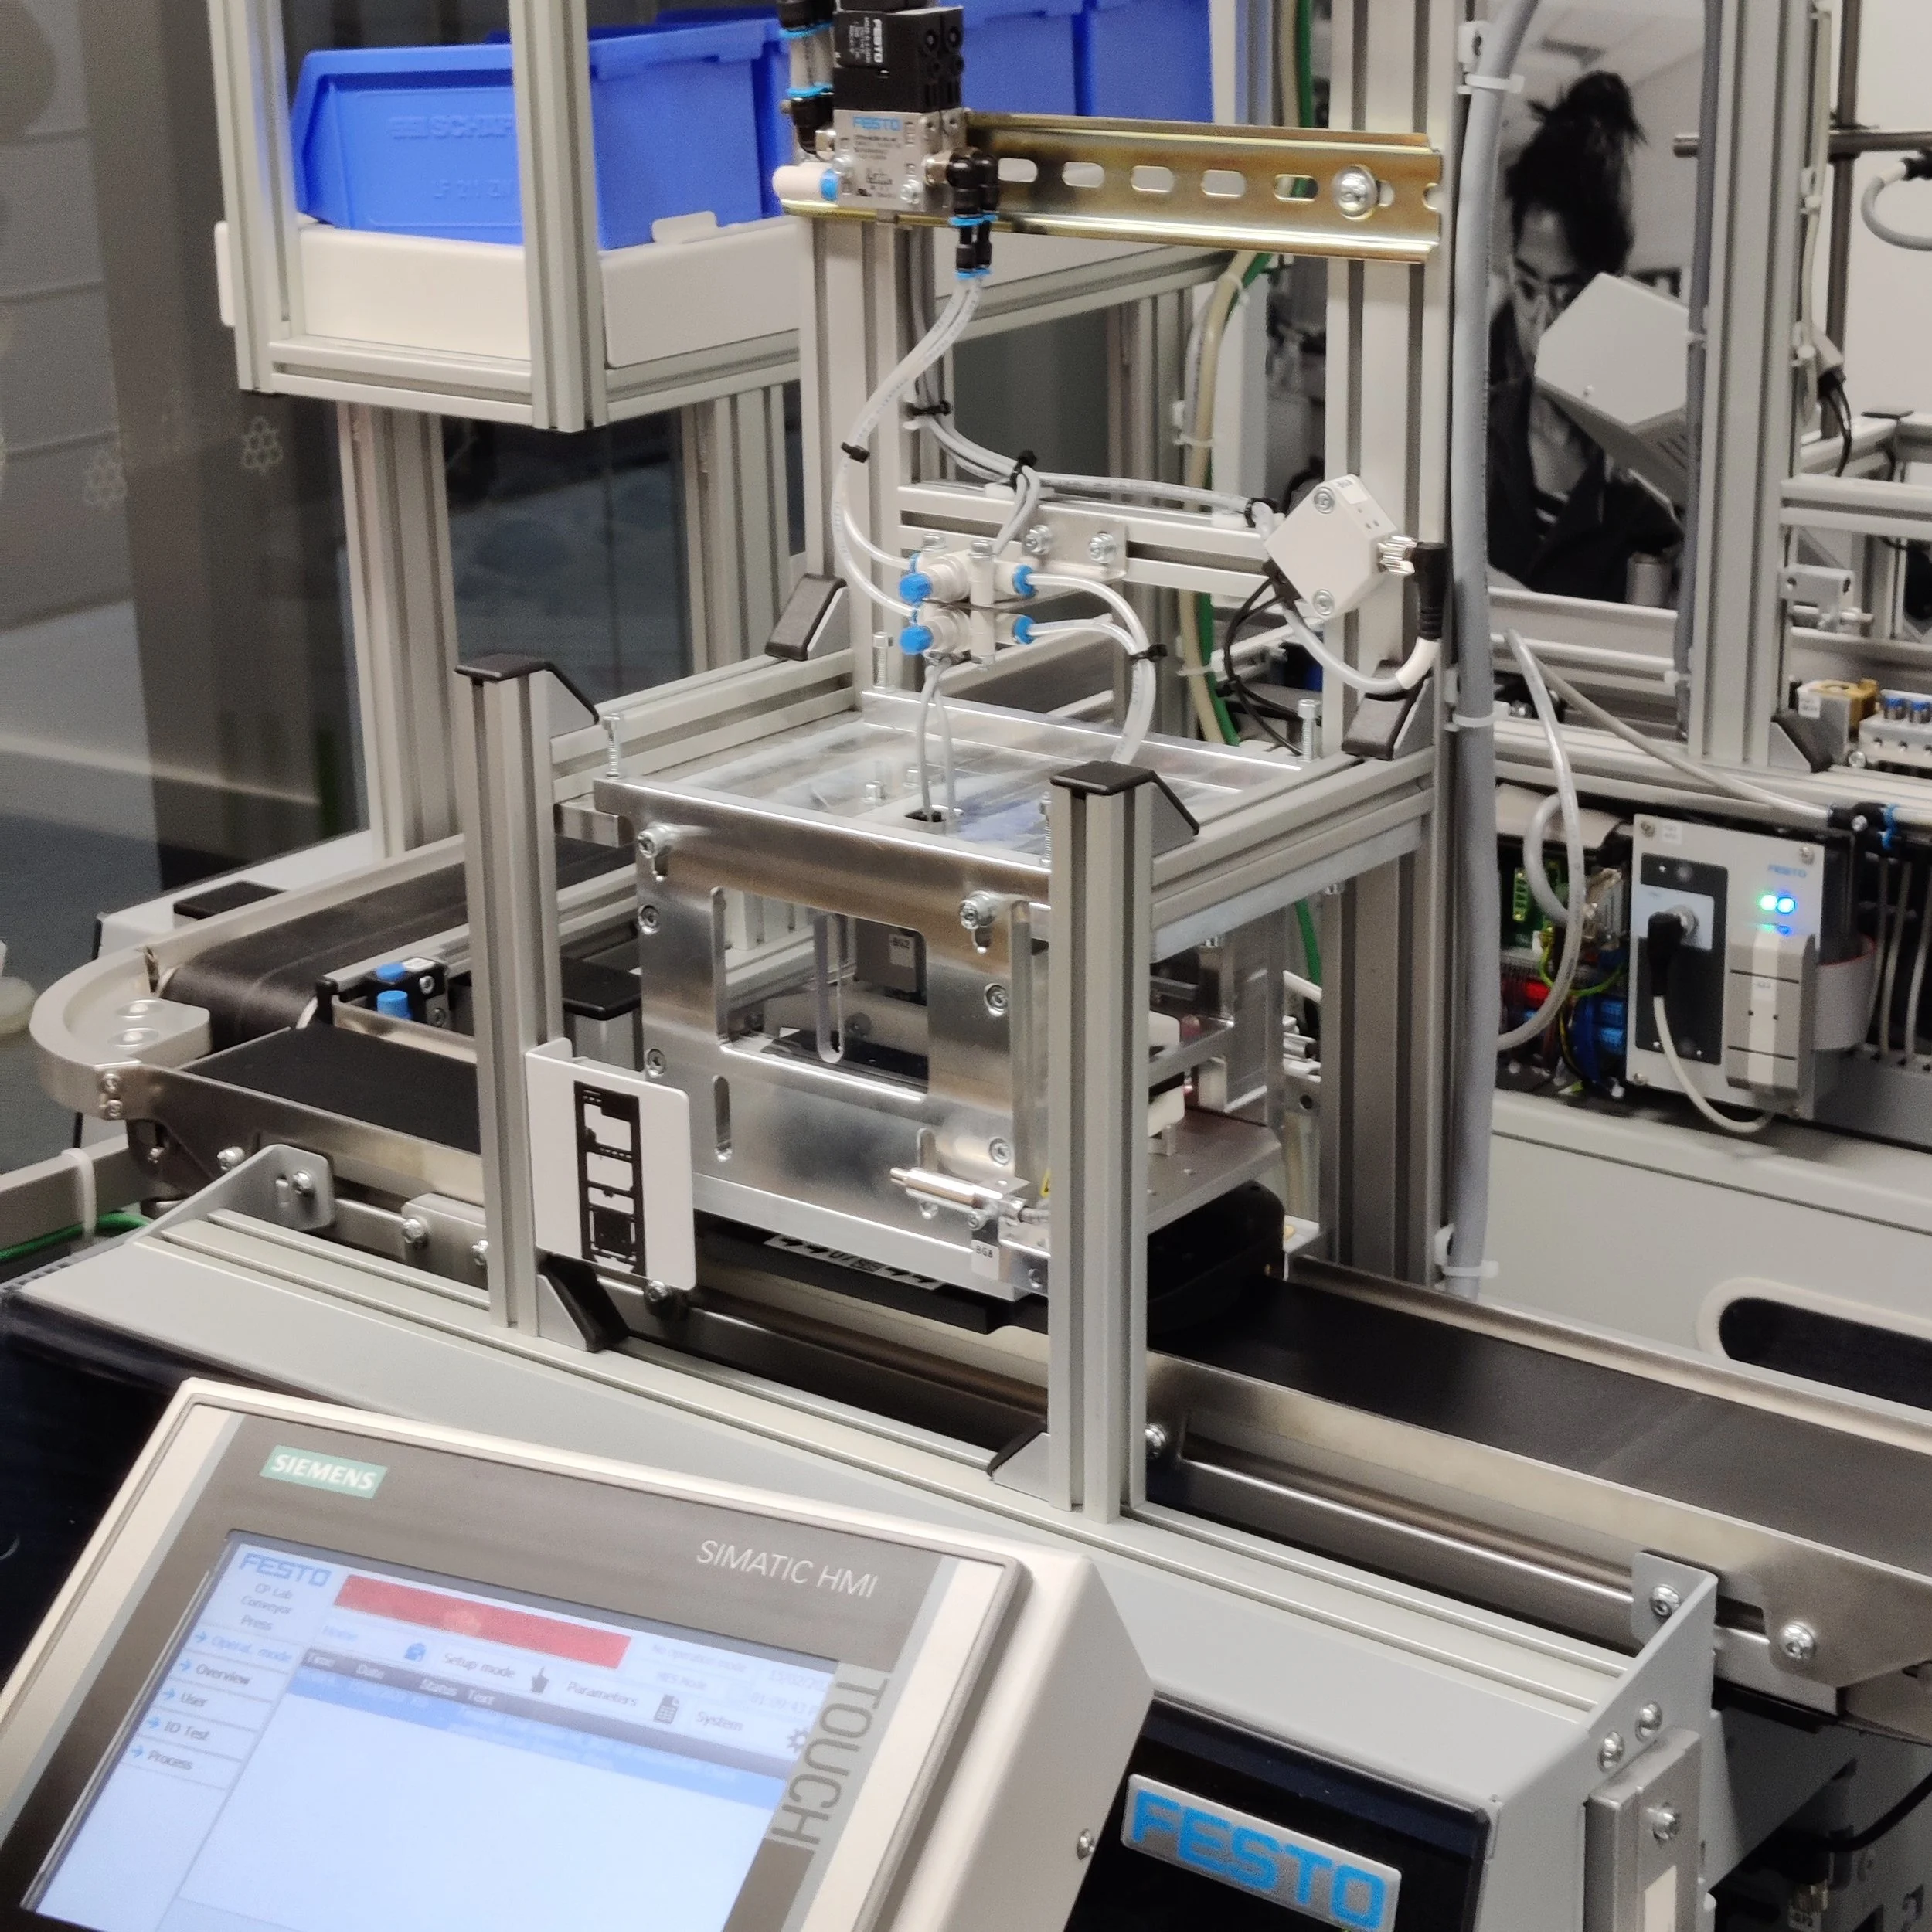
Figures 16-21 show the six stations on the production line. The prototype phone case needed to pass through each of these stations without error to be considered successful.
Production Line
The production line was comprised of the following stations:
Station Zero - Pre-production
The production line must be ordered to produce a set amount of phone cases. This includes setting up a bill of materials and the desired quantity of phone cases. A single production order can contain multiple productions.
This process was not relevant in assessing the quality of my prototype, so no data was gathered during this stage.
Station One - Phone Case Deposition (Fig.16)
This station required an operator to load a magazine with top phone case parts in the correct orientation. An empty carriage with production orders assigned to it would then pass under the magazine and stop whilst a phone case was deposited. The deposition would be recorded and the carriage would then move along the conveyor belt to the next station. There seemed to be a low chance of failure during this task with the main risks being human error and misalignment of the phone case on the carriage.
During this process no issues were discovered with the performance of my prototype. The casing fit perfectly within the magazine and deposited onto the carriage without error.
Station Two - Laser Sensor (Fig.17)
The carriage would pass under this station and stop briefly whilst a laser sensor measured the thickness of the phone casing. The thickness was recorded and compared against the desired measurement (2mm). If the thickness of the phone case was within an acceptable tolerance the carriage would proceed to the next station along the conveyor belt.
My prototype passed through this station and the thickness of the casing was within the acceptable range. However, during my peer’s testing sessions, it was found that embossed/debossed text, identification tags and highly reflective surfaces could interfere with the laser measurement. Therefore, any tracking information included on the interior of the case should be positioned away from the laser measurement location.
Station Three - Pick by Light (Fig.18)
This station required an operator to pick and place the components required for assembling the phone casing. The operator was guided by interactive lights that helped to identify the correct components and the quantity of each. Components were individually placed by hand before the operator signalled the carriage to move on to the next station.
All the required electronic components fit within my prototype and it married with the other half of the phone case perfectly. No issues were detected.
Station Four - Hydraulic Press (Fig.19)
This station continued the assembly of the phone by pressing the two halves of the plastic casing together.
Problems consistently arose when the carriage passed through this station regardless of the part that was being assembled and the two halves of the case often did not snap together. This could be a result of human error when aligning the two halves together at the previous ‘pick by light’ station or it could be a design flaw in the hydraulic press. These issues were even present when testing the original injection moulded parts.
Station Five - Heating (Fig.20)
This station applied heat (about 40°C) to the assembled phone to simulate the curing of glue or the sealing of packaging material around the product. Within the mock simulations no glue or packaging material was used, but this step would need to be considered within the context of mass-manufacture.
It was discovered that the heat from this station could cause the casing to temporarily expand and this would force the two haves of the casing apart. This issue was especially prevalent when the original injection moulded part was tested but did not occur when my prototype passed through.
Station Six - Production Output (Fig.21)
This station concluded production by outputting the finished phone case on an ejection ramp. A robotic claw would grab the assembled phone, lift it from the carriage and deposit it on the ramp, ready for collection and additional packaging by a production operative.
It was relatively likely that the phone case could become misaligned when deposited on the ramp and become stuck. This did not happen during my test run but it is a known issue.
Production Process Video
This video recording shows a test of the production line using the original injection moulded phone case.
conclusion of process testing
The SLA phone case performed well on most stations, however the hydraulic press presented difficulties. There were issues on this station with everyone’s part, including the original injection moulded pieces. This could be a result of human error when positioning components at the previous ‘pick by light’ station, which highlights the importance of training operational staff on the use of production line equipment to optimise the production process. However, within the context of mass-manufacturing, this process would likely be automated with robotics to allow rapid and consistent positioning of components.
This production line test also highlighted the importance of PFMEA Analyses to identify and mediate production line risks. To continue with the theme of quality assurance, a comprehensive PFMEA analysis will be performed within the next blog with the aim of reducing manufacturing and production risks.
REFERENCES
CREATE Education. (no date) UlitMaker PLA. [Online image] [15/02/2023] URL https://marketplace.createeducation.com/product/ultimaker-pla/
FormLabs. (no date) Materials Store. FormLabs. [Online] [15/02/2023] https://formlabs.com/store/materials/
Impac Systems Engineering. (no date) HP 3D HR PA 11 300L /140KG. [Online image] [15/02/2023] URL https://impacsystems.com/product/hp-3d-hr-pa-11-300l-140kg/
Mark3D. (no date) 17-4 Stainless Steel Material 200cc spool. [Online image] [15/02/2023] URLMarkforged 17-4 Stainless Steel Material 200cc spool - buy now (mark3d.com)
Mark3D. (no date) Markforged Onyx. Mark3D. [Online image] [15/02/2023] URL https://www.mark3d.com/en/product/filaments-for-markforged-3d-printers/markforged-onyx-filament-fff-800-cm%C2%B3-roll/=
Photocentric. (no date) UV Resins. Photocentric. [Online] [15/02/2023] https://photocentricgroup.com/shop-uv-3d-resins/?wpf=uv_resins&wpf_cols=4&wpf_material-range=uv-rigid
Plot-IT. (no date) Stratasys PLA Black 60ci for F123 Series 3D Printer (333-60101). [Online image] [15/02/2023] Stratasys 333-60101 PLA Black 60ci Material Spool (plot-it.co.uk)


